Setting up ESLint in a Next.js TypeScript Project: Improving Code Quality and Consistency

Meet your perfect match for FullStack Software Development! I am a result-driven developer with a year of experience building amazing web applications, optimizing code, and adhering to best practices. With expertise in PHP, Python, Javascript, Typescript, Laravel, VueJS, Nuxt, React, and more, I am confident in my ability to deliver top-notch work. I am a self-motivated individual who is comfortable working within a team or independently in dynamic circumstances. Let's connect and create something amazing together!
Linting is an essential process for ensuring that our codebase is free of errors, adheres to best practices, and follows a consistent style. By analyzing source code, linters like ESLint can detect potential issues and provide recommendations to improve code quality.
ESLint is a popular linting tool that helps improve code quality and consistency. It checks code for potential errors, enforces code style conventions, and provides helpful suggestions for improving code readability and maintainability. ESLint can be configured and integrated into a wide variety of projects, including React, Vue, Svelte, TypeScript projects etc. Let's take a closer look at how to set up ESLint in a Next.js/Typescript project.
Creating a Nextjs/TypeScript Project
To get started, we first need to create a new React TypeScript project. We can do this using the create-next-app CLI tool:
npx create-next-app eslint-next-app --template typescript
This command creates a new React project called eslint-next-app using the TypeScript template. Accept the default and the recommended settings and continue if all goes well you should have a terminal output similar to the one below.

Once the project is created, we can navigate into the project directory and start the development server:
cd eslint-next-app
npm run dev
Now we can open our browser and navigate to http://localhost:3000 to see the default React TypeScript app running.
With our project set up, we can move on to the next step of installing and configuring ESLint.
Installing and Configuring ESLint
Now that we have set up a new Next.js TypeScript project, let us install and configure ESLint. Open your terminal and navigate to the project directory (eslint-next-app in our case). Run the following command to install ESLint:
npm install eslint --save-dev
After installing ESLint, let's configure it to work with our project. Use the following command to create a new ESLint configuration file:
npx eslint --init
#or
npm init @eslint/config
This command will prompt you with a series of questions to configure ESLint. Here are some recommended settings:
How would you like to use ESLint? · To check syntax, find problems and enforce code style (style)
What type of modules does your project use? · JS modules (esm)
Which framework does your project use? · react
Does your project use TypeScript? · Yes
Where does your code run? · press 'a' to select all option browser, node
How would you like to define a style for your project? · Use a popular style guide
Which style guide do you want to follow? · (standard-with-typescript)
What format do you want your config file to be in? · JavaScript
After answering these questions, ESLint will prompt you with information about the packages that will be installed based on the configuration choices you made. Choose 'Yes' to install the packages.
Once the configuration is complete, a new pre-populated .eslintrc.js file will be created in your project directory with our preferred settings above. Your .eslintrc.js file should look like this:
module.exports = {
  env: {
    browser: true,
    es2021: true,
    node: true
  },
  extends: [
    'plugin:react/recommended',
    'standard-with-typescript'
  ],
  overrides: [
  ],
  parserOptions: {
    ecmaVersion: 'latest',
    sourceType: 'module'
  },
  plugins: [
    'react'
  ],
  rules: {
  }
}
Next let us
to ensure we are using the React hooks correctly.
npm install eslint-plugin-jsx-a11y eslint-plugin-react-hooks --save-dev
Now, open your .eslintrc.js file and update it with the following:
module.exports = {
  env: {
    browser: true,
    es2021: true,
    node: true
  },
  extends: [
    'plugin:react/recommended',
    'plugin:jsx-a11y/recommended',
    'plugin:react-hooks/recommended',
    'standard-with-typescript',
    'next/core-web-vitals'
  ],
  overrides: [
  ],
  parserOptions: {
    ecmaVersion: 'latest',
    sourceType: 'module',
    project: ['./tsconfig.json']
  },
  plugins: [
    'react',
    '@typescript-eslint',
    'jsx-a11y',
    'react-hooks'
  ],
  rules: {
    'react/jsx-filename-extension': [1, { extensions: ['.tsx'] }],

    '@typescript-eslint/no-var-requires': 'off',
    '@typescript-eslint/explicit-function-return-type': 'off'
  }
}
This configuration extends the Standard with TypeScript style guide, includes recommended TypeScript and React plugins, and sets some rules to improve code quality. We have set up ESLint to analyze code for both browser & node environment and ECMAScript 6 syntax. You can also enable all the recommended or strict rules at once by extending the plugins and as well as override the rules according to your choices.
At this point, you have successfully installed and configured ESLint for your Next.js TypeScript project. ESLint will now check your code for errors, highlight potential issues, and enforce code style, which will ultimately improve the quality and consistency of your codebase.
Linting Script
To run our linter, we need a script to run it and for this we will define the linting script in package.json. This script specifies the command to run ESLint and which files to analyze.
Update your package.json file with the following lines:
{
  "scripts": {
    ...
    "lint": "eslint --ext .ts,.tsx ./src ",
    "lint:fix": "eslint --ext .ts,.tsx ./src --fix"
  },
}
In the above script, we have defined lint script that runs ESLint on all .ts and .tsx files in the ./src folder, while lint:fix runs a fix action to all potentially fixable erroneous codes on all .ts and .tsx files in the ./src folder.
ESLint Ignore
Sometimes, we don't want to lint every folder and file in our project. We can tell ESLint to ignore folders and files by defining them in the .eslintignore file at the project root. This file works similarly to .gitignore and specifies patterns of files to ignore.
Here is an example of .eslintignore file:
.next
node_modules
dist
build
In this example, we have instructed ESLint to ignore .next, node_modules, dist, and build folders.
Using ESLint with Your Code Editor
To make the most of ESLint, it is recommended that you integrate it with your code editor. This will allow you to see ESLint errors and warnings in real-time, as you write code.
To integrate ESLint with your code editor, you can install an ESLint extension. Most popular code editors like Visual Studio Code, Sublime Text, and Atom have ESLint extensions available.
For Visual Studio Code, you can install the ESLint extension by following these steps:
Open the Extensions sidebar (Ctrl+Shift+X).
Search for "ESLint" in the Marketplace.
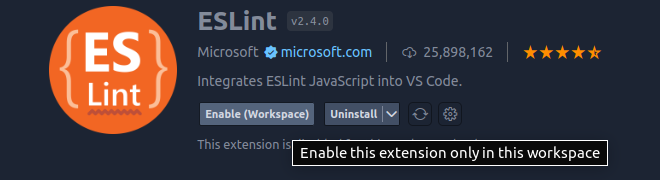
Click "Install" on the ESLint extension by Microsoft.
Once the extension is installed, you must enable it by clicking on the Enable button on the extension page as shown below.
Now, we need to make sure the ESLint extension is configured to check React and TypeScript. So, open the Settings area in Visual Studio Code. The Settings option is in the Preferences menu in the File menu on Windows or in the Preferences menu in the Code menu on a Mac.
In the settings search box, enter "eslint: probe" and select the Workspace tab:
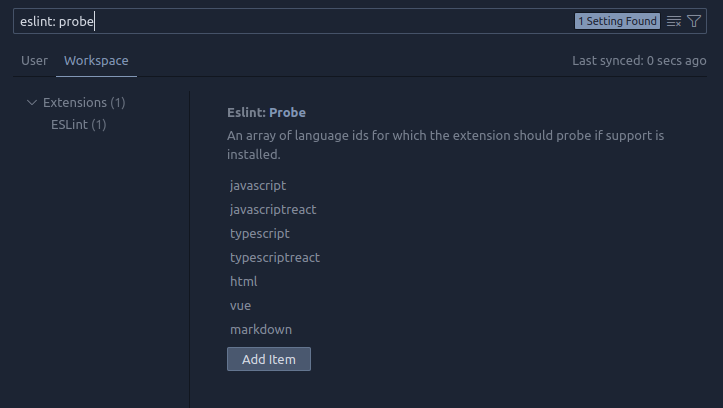
Make sure that
typescriptandtypescriptreactare on the list. If not, add them using the Add Item button.
The ESLint extension for Visual Studio Code is now installed and configured in the project.
To test our set up in action open .src/pages/_app.tsx and delete the space before the function keyword and the function name App parentheses and run npm run lint in your terminal you should this in see below screenshot.

Also, when you hover your mouse on the error/warning you should have details of what is going on as shown below and it offers a quick fix where applicable.
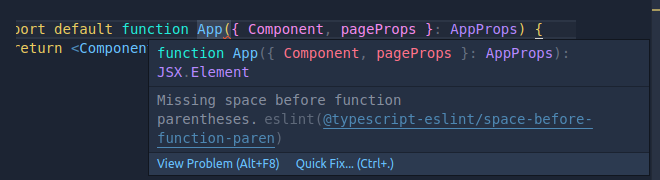
Voila! our eslint set up is working.
Conclusion
ESLint is a powerful tool that can help improve the quality and consistency of your code, but it is just one side of the coin. In addition to ESLint, using a code formatter like Prettier can further enhance the readability and maintainability of your code. In the upcoming article, we will explore how to integrate Prettier with ESLint to streamline your code formatting process.
In this article, we've walked through the process of setting up ESLint in a Next.js TypeScript project, from installing and configuring ESLint to integrating it with your code editor. By following these steps, you can ensure that your code meets the highest standards of quality and consistency.
You can download the example code files for this article from GitHub at https://github.com/devshittu/eslint-next-app. If there’s an update to the code, it will be updated in the GitHub repository.
For more information about ESLint, see the following link: https://eslint.org/.