Mastering Code Formatting with Prettier in Next.js TypeScript Projects

Meet your perfect match for FullStack Software Development! I am a result-driven developer with a year of experience building amazing web applications, optimizing code, and adhering to best practices. With expertise in PHP, Python, Javascript, Typescript, Laravel, VueJS, Nuxt, React, and more, I am confident in my ability to deliver top-notch work. I am a self-motivated individual who is comfortable working within a team or independently in dynamic circumstances. Let's connect and create something amazing together!
Introduction:
In our previous article, we walked through the process of setting up ESLint in a Next.js 13 TypeScript project to improve code quality and consistency. The source code for the ESlint can be found on this Github repo. However, ESLint only enforces code-style rules, leaving the responsibility of formatting code to the developer. This is where Prettier comes in. Prettier is a code formatter that automatically formats your code to a consistent style, saving you time and ensuring that your code looks great.
In this article, we will show you how to integrate Prettier into an already linted Next.js 13 project, so that you can automate the formatting of your code and take your code quality to the next level.
Prerequisites
Before we begin, make sure that you have the following set up on your computer:
- ESLint (installed and configured in your project, as covered in our previous article).
Installing Prettier
To install Prettier, simply run the following command in your terminal:
npm install --save-dev --save-exact prettier
Configuring Prettier
Prettier comes with a default configuration out of the box. We can override this by creating the .prettierrc file and modifying the configuration. To achieve this open your terminal and enter touch .prettierrc to create the new configuration file in the root directory of your project, and add the following basic configurations:
{
  "endOfLine": "auto",
  "tabWidth": 2,
  "semi": true,
  "singleQuote": true,
  "trailingComma": "all",
  "printWidth": 80
}
In the configuration above we set printWidth option which sets the maximum line length before Prettier will try to wrap the code, singleQuote this controls whether to use single quotes (') for string literals, and semi: this controls whether to add a semicolon at the end of each statement and more.
This configuration specifies the code formatting rules that Prettier should follow. Feel free to customize it to your liking, you can gain more insights on available options on the Prettier official documentation page.
Integrating Prettier with ESLint
To ensure that Prettier and ESLint work together seamlessly, we will use the eslint-config-prettier plugin. This plugin disables any ESLint rules that conflict with Prettier formatting rules.
First, install the plugin by running the following command in your terminal:
npm install --save-dev eslint-config-prettier
Next, update your .eslintrc.json file as follows:
{
  "extends": [
    ...
    "prettier"
  ],
  "plugins": [],
  "rules": {}
}
Notice the addition of "prettier" to the "extends" array. This tells ESLint to use the eslint-config-prettier plugin that we installed and disable any conflicting rules.
Formatting Your Code with Prettier
Now that Prettier is set up in your project, you can format your code by running the following command in your terminal:
npx prettier --write .
This command formats all the files in the root folder of your project according to the rules specified in the .prettierrc file. To explore further options that you can play around with, visit the prettier options page.
Ignoring Files and Folders
There may be files in your project that you don't want Prettier to format. To exclude these files from formatting, open your terminal and enter touch .prettierignore command creates a .prettierignore file in your project's root directory.
Here's an example of some files and/or folders you might want to ignore:
node_modules
dist
public/*
This will ignore the node_modules, dist, and any file inside public directory.
Prettier Scripts
To run Prettier in our project, we need to define a script in our package.json file. This script specifies the command to run Prettier and which files to analyze.
To define the script, update your package.json file with the following lines:
{
  "scripts": {
    ...
    "prettier": "prettier \"**/*.+(json|ts|tsx)\"",
    "format:fix": "npm run prettier -- --write",
  },
}
In the above script, we have defined a Prettier script that runs Prettier on all .json, .ts, and .tsx files in our project folder. We have also defined a format:fix script that fixes all potentially fixable erroneous codes on all .ts and .tsx files in our project folder.
Integrating with VS Code
To integrate Prettier with VS Code, you'll need to install the Prettier extension. To do this, follow these steps:
Open VS Code and click on the Extensions icon in the sidebar or hit the Ctrl + Shift + X shortcut key.
Search for "Prettier - Code formatter" in the Marketplace.
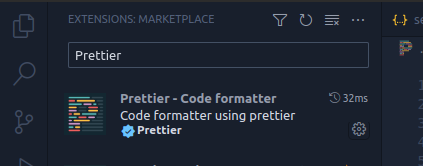
Click on "Install" to install the extension.
Once the extension is installed, you can configure it to format your code on save. To do this, follow these steps:
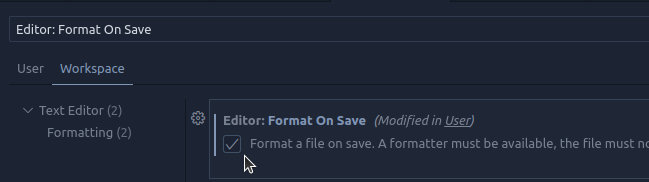
Open the VS Code settings (File > Preferences > Settings).
Search for "Editor: Format On Save".
Check the box to enable format on save.
Now, whenever you save a file in VS Code, Prettier will format the code according to the rules you've specified in your configuration file.
Conclusion
Congratulations on making it this far! By following the steps outlined in this article, you should now have Prettier integrated into your Next.js TypeScript project, improving the quality and consistency of your code.
In addition to the benefits of using ESLint, Prettier makes formatting your code much easier and more consistent, saving you time and effort. With these two tools working together, you can be confident that your code is of the highest quality.
Thank you for reading this article, and I hope it has been helpful in improving your code quality and consistency. In the next article, we will cover how to integrate Husky with ESLint and Prettier to enforce code quality and consistency even further.